Composing and sending
Writing email shouldn't mean switching to another program and losing sight of the customer you're working on. In MailDesk you write, format, attach, and send right inside Odoo — next to the same contacts and records you already use. This page walks you through the composer step by step, then shows two Pro features that make repeated mail much faster: signatures and email templates.
Writing email shouldn't mean switching to another program and losing sight of the customer you're working on. In MailDesk you write, format, attach, and send right inside Odoo — next to the same contacts and records you already use. This page walks you through the composer step by step, then shows two Pro features that make repeated mail much faster: signatures and email templates.
Composing versus replying
Use Compose to start a fresh conversation. To continue an existing one, use Reply, Reply All, or Forward instead — those are covered in Replying and forwarding. Good news: the composer window works exactly the same way in every case, so once you learn it here you've learned it everywhere.
The composer at a glance
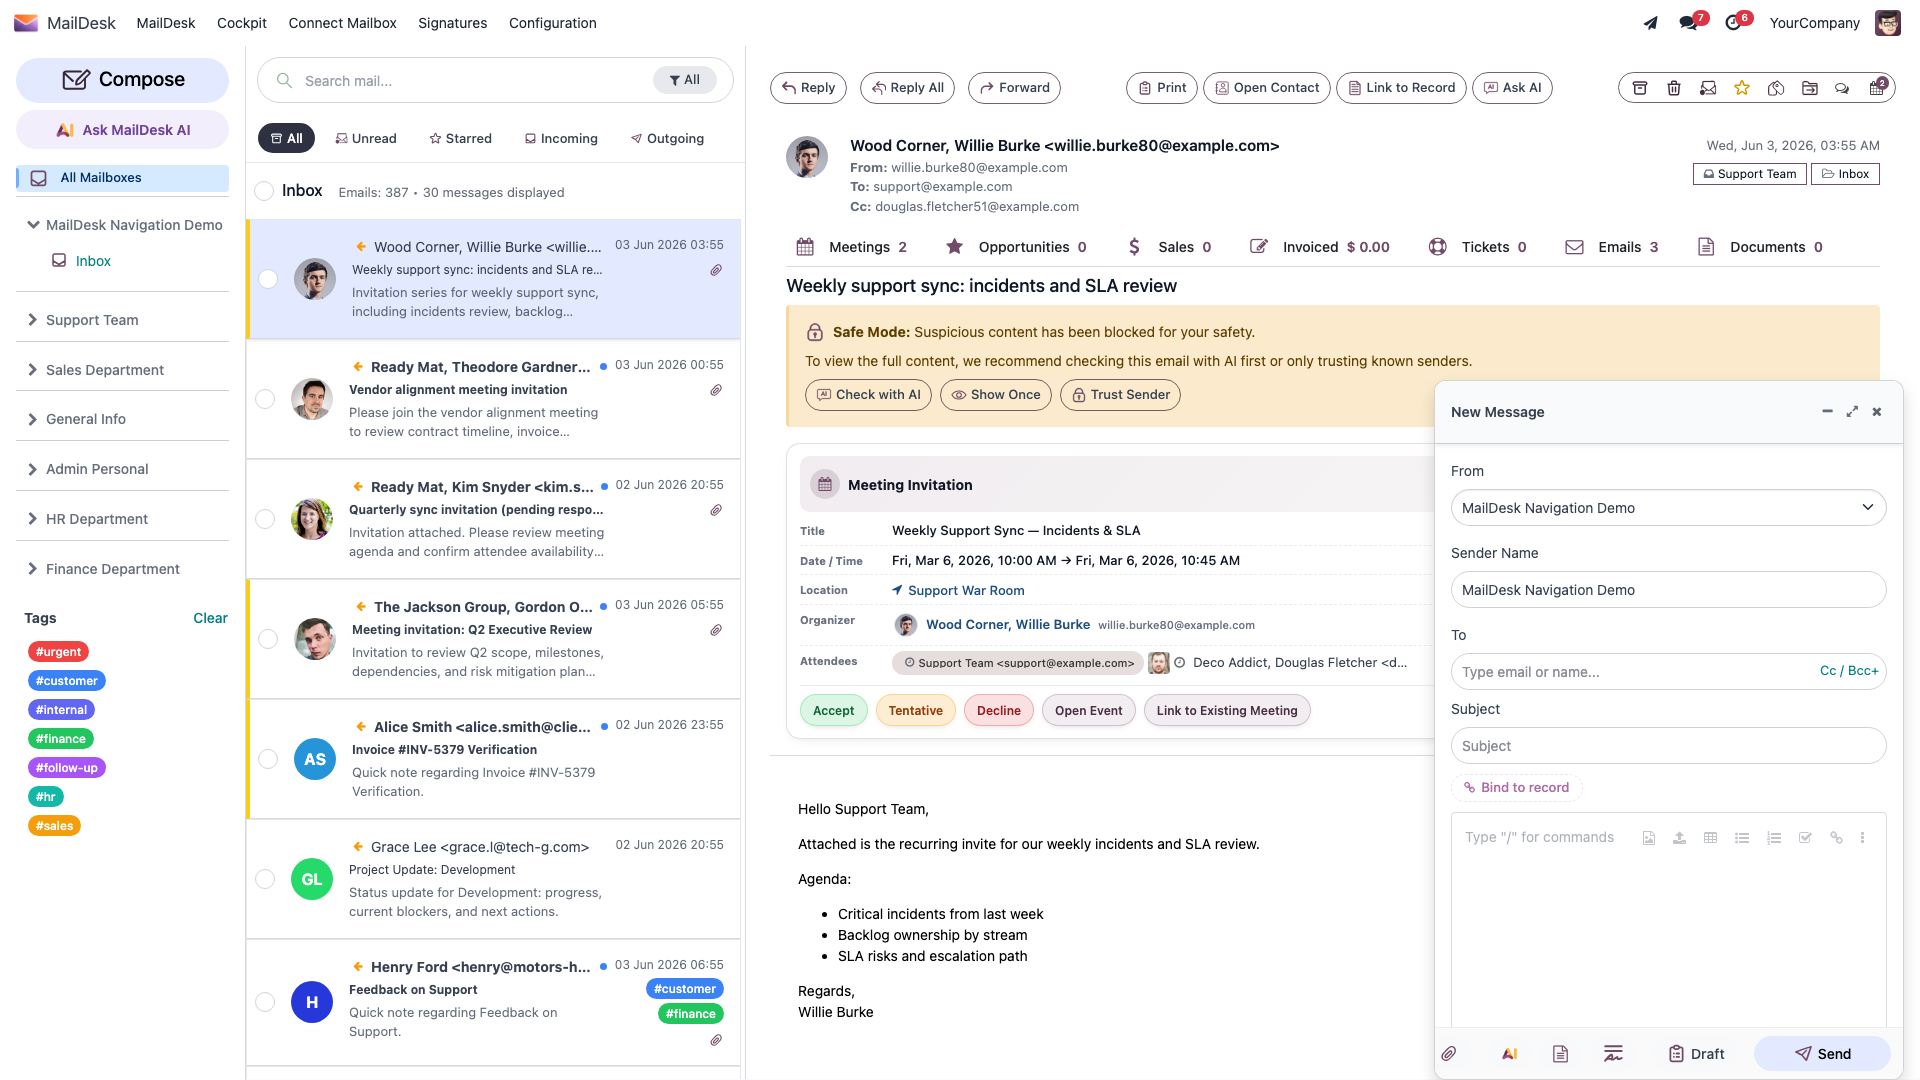
The composer is a small, movable window that floats over your inbox. You can keep it open while you look something up, so you never lose your place. From a single window you can:
- choose which mailbox the message is sent From,
- adjust the Sender Name your recipient sees,
- add recipients in To, Cc, and Bcc,
- write a Subject,
- format the body with a rich-text editor — bold, lists, links, images, and more,
- attach files,
- save a draft to finish later, and
- send the message immediately.
Everything stays inside Odoo, and a copy of everything you send is kept in your Sent folder — so there's no separate mail program to manage and nothing to lose track of.
Before you start
- You need at least one mailbox connected to MailDesk that you have access to.
- To send, that mailbox needs a working outgoing mail server. Your administrator sets this up when they connect the account, so it's usually already in place.
You can compose and send from any mailbox you have access to. Picking a template or a signature while you write is open to every mailbox user — only creating and editing templates is an administrator task.
Write and send a new email
- Click Compose at the top of the folder tree. The composer window opens.
- In From, choose the mailbox you want to send from (you'll only see this if you have more than one).
- Optionally adjust the Sender Name — the friendly name your recipient sees alongside the address.
- Type one or more recipients in To. Need to copy people? Turn on Cc and Bcc from the To field's controls (see To, Cc, and Bcc below).
- Enter a Subject.
- Write your message in the editor. Format text, add links and images, paste freely — it behaves like the rich-text editor you already know.
- Attach any files (see Adding attachments).
- Click Send.
Expected result: the message goes out through your mailbox's outgoing server and appears in your Sent folder right away. If the recipient replies later, their reply joins the same conversation automatically — no hunting for the original thread.
Why your sent message shows up instantly
MailDesk places your sent message in the Sent folder the moment you press Send, then quietly swaps it for your provider's own copy on the next sync. That closes the "where did my sent mail go?" gap some email clients leave. A short wait before the provider's copy arrives is completely normal.
Keeping the window out of your way
The composer window can be minimized to a small bubble — handy when you need to check a figure or copy a contact while you keep writing — expanded to fullscreen for longer messages, and closed when you're done.
Closing discards unsaved work
Closing the composer throws away anything you haven't saved. If you want to keep your work, save a Draft first (see Saving a draft).
To, Cc, and Bcc
| Field | Who it's for | Who can see it |
|---|---|---|
| To | The main recipient(s) of the message | Visible to everyone |
| Cc | People who should be kept informed | Visible to all recipients |
| Bcc | People who get a quiet copy | Hidden from other recipients |
To keep the composer tidy, the Cc and Bcc fields stay hidden until you switch them on from the To field's controls. Turn them on only when you actually need them.
Use Bcc with care
Recipients can't see who's on Bcc — which is exactly what makes it useful for keeping a private copy or sparing a long recipient list. Just double-check the field before sending so a copy doesn't land somewhere you didn't intend.
Adding attachments
Click the Attach button in the composer footer and choose a file. Attached files are listed just above the footer, so you can see at a glance what's going out — and remove anything before you send.
For the full picture — including previewing and downloading files you receive — see Working with attachments.
Big files
Keep attachments to a sensible size, and share very large files with a link instead. And make a habit of glancing at the attachment list before you press Send.
Saving a draft
Not ready to send? Click Draft in the composer footer to save your work. The saved message lands in your Drafts folder with a clear [Draft] label, ready whenever you are.
To pick it back up, open it from the Drafts folder and choose Edit Draft — the composer reopens with everything exactly as you left it: recipients, subject, body, and attachments.
Note
Remember: closing a composer window discards anything unsaved, so save a Draft first if you want to keep it.
Signatures
Available in: Pro
A signature should match the mailbox you're writing from — your personal mailbox and a shared team mailbox shouldn't sign off the same way. With MailDesk Pro, each mailbox carries its own signature, and when you compose or reply, that mailbox's default signature is added to the bottom of your message automatically. No more pasting the right block every time.
For any single message you can switch the signature, edit it inline, or remove it.
Choose or change a signature while composing
- In the composer footer, click the signature button.
- The Choose Signature picker opens, listing the signatures available for the current mailbox. A badge shows each one's scope and which is the Default.
- Click a signature to insert it. It replaces whatever signature is already in the message.

Picking a signature also sets the sender name
Choosing a signature updates both the signature block and the Sender Name your recipient sees — so the name on the email and the name in the signature always agree.
Manage your signatures
- Open MailDesk → Signatures. (The Manage Signatures button inside the picker opens the same list.)
- Click New to add a signature.
- Fill in the name, the mailbox it belongs to, an optional Sender Name, and write the signature content in the rich-text body. Tick Default to make it the automatic choice for that mailbox.
- Save.
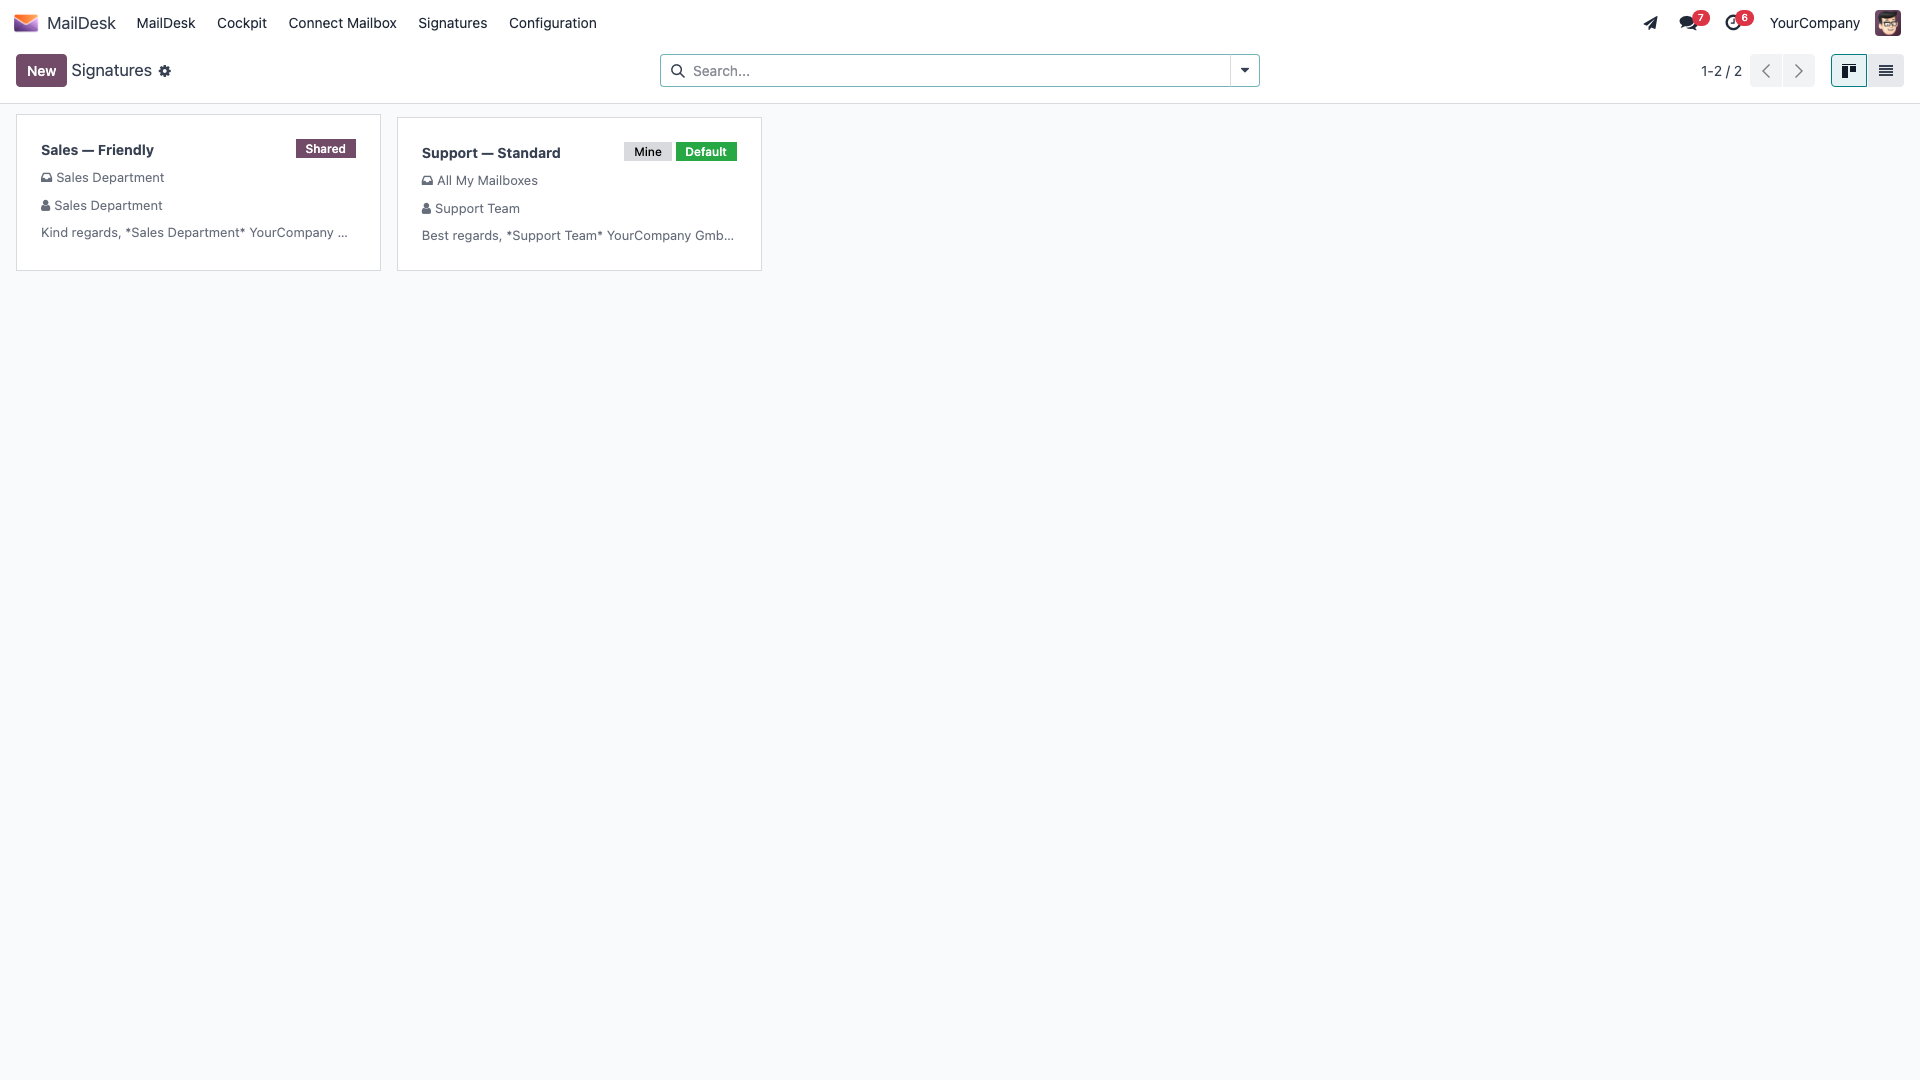
You can keep several signatures for one mailbox — say, a fuller one with all your details for first contact and a short one for ongoing replies — and pick the right one from the composer as you go.
If a signature doesn't appear
Check three things: the mailbox has at least one signature, one of them is marked Default, and the composer's From field shows the mailbox you expect. For shared mailboxes, your administrator can manage signatures on your behalf.
Email templates
Available in: Pro
If you send the same kinds of messages over and over — quote follow-ups, support replies, onboarding notes — templates save real time. With MailDesk Pro you pick a template straight from the composer, and it fills in the subject, body, and recipients for you to tweak before sending. You're always in control: nothing goes out until you press Send.
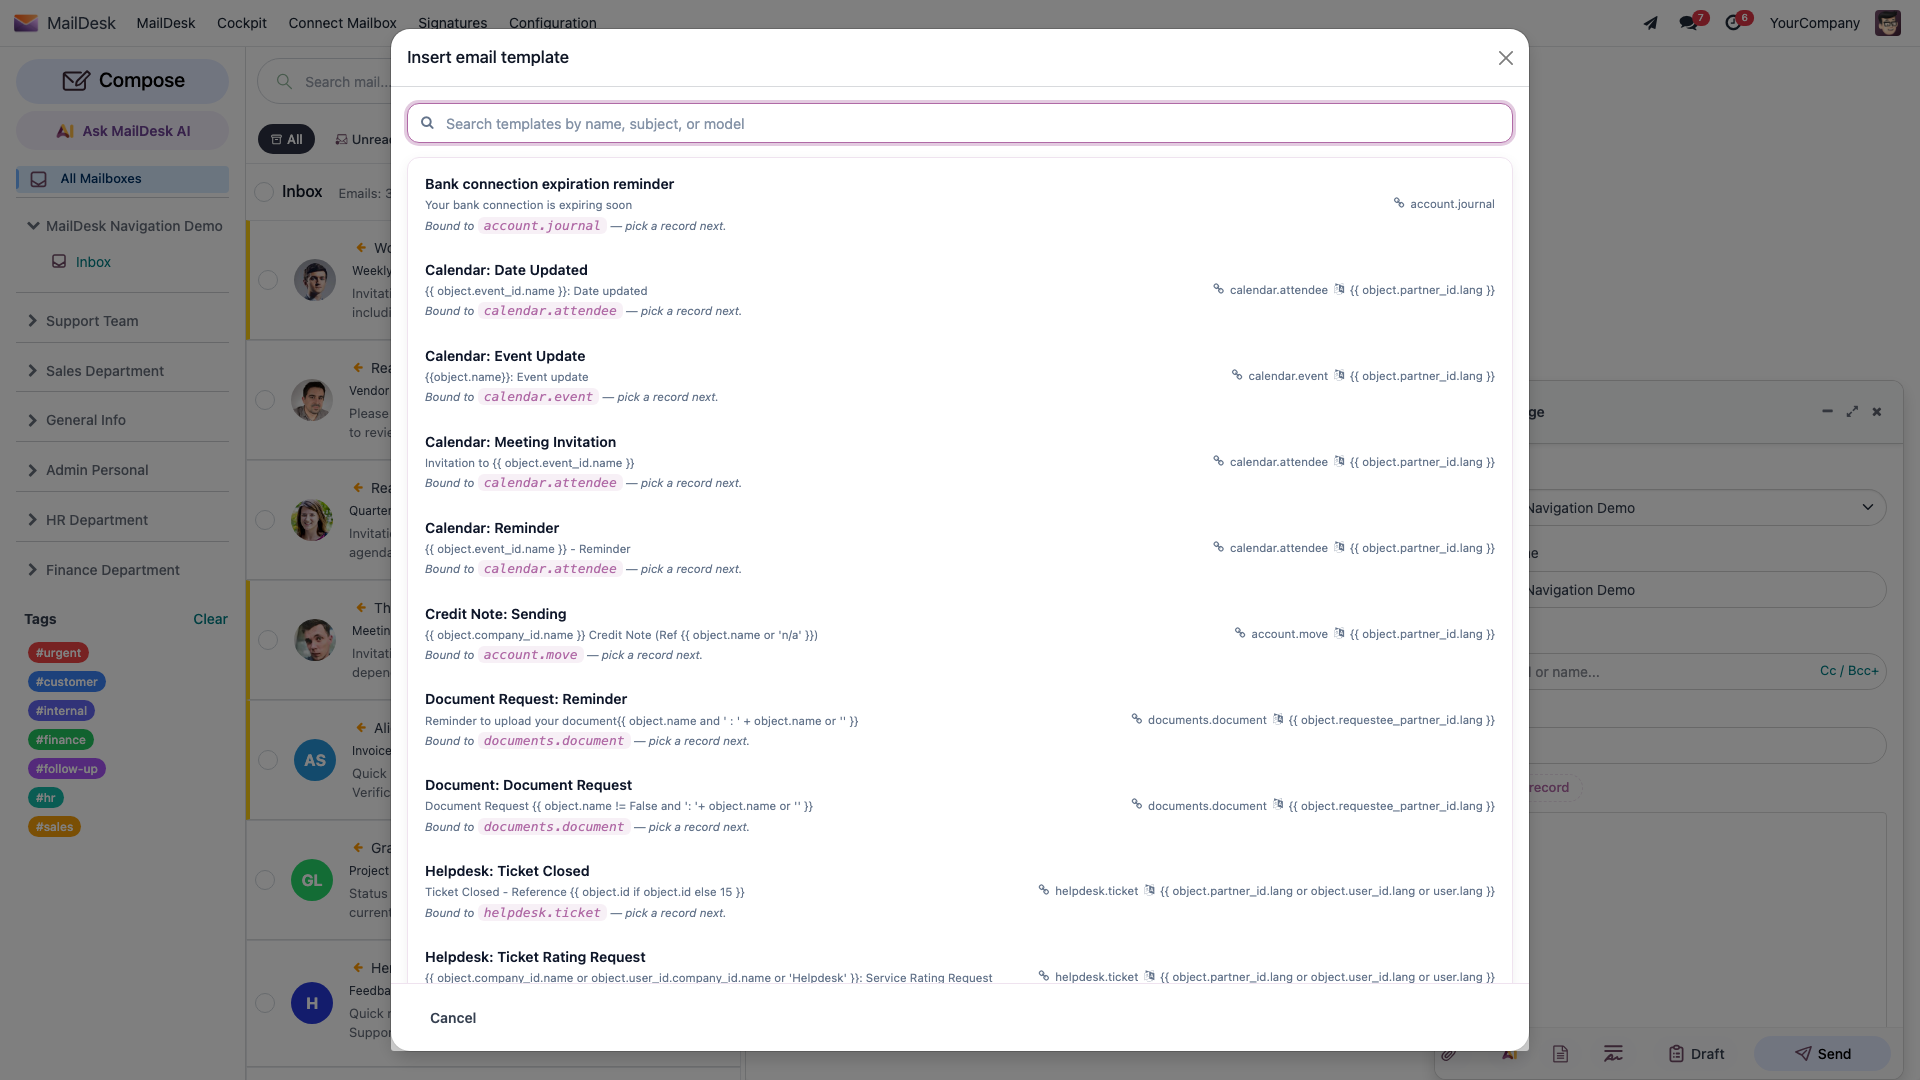
Insert a template while composing
- In the composer footer, click the Insert template button.
- The Insert email template picker opens. Search by name, subject, or model to find the one you want.
- Click a template. Its content is merged into your message — the subject is set, the body is added, and any recipients and attachments defined on the template are brought in.
- Adjust the result as needed and send.
Templates never fire on their own
A template is simply a head start that you choose by hand. MailDesk never sends automatic replies on your behalf.
Templates tied to a record
A template can be linked to an Odoo record type — a contact, a CRM lead, a Helpdesk ticket, a Sale order, and so on. When you pick a record-bound template, MailDesk asks you to pick a record so it can fill in the template's placeholders — the customer's name, an order number, a ticket subject — straight from that record. Prefer to skip it? Choose Apply without a record and the record-specific placeholders simply stay empty.
If the email you're replying to is already linked to a record, the picker can use that record directly and skip the extra step — one less click.
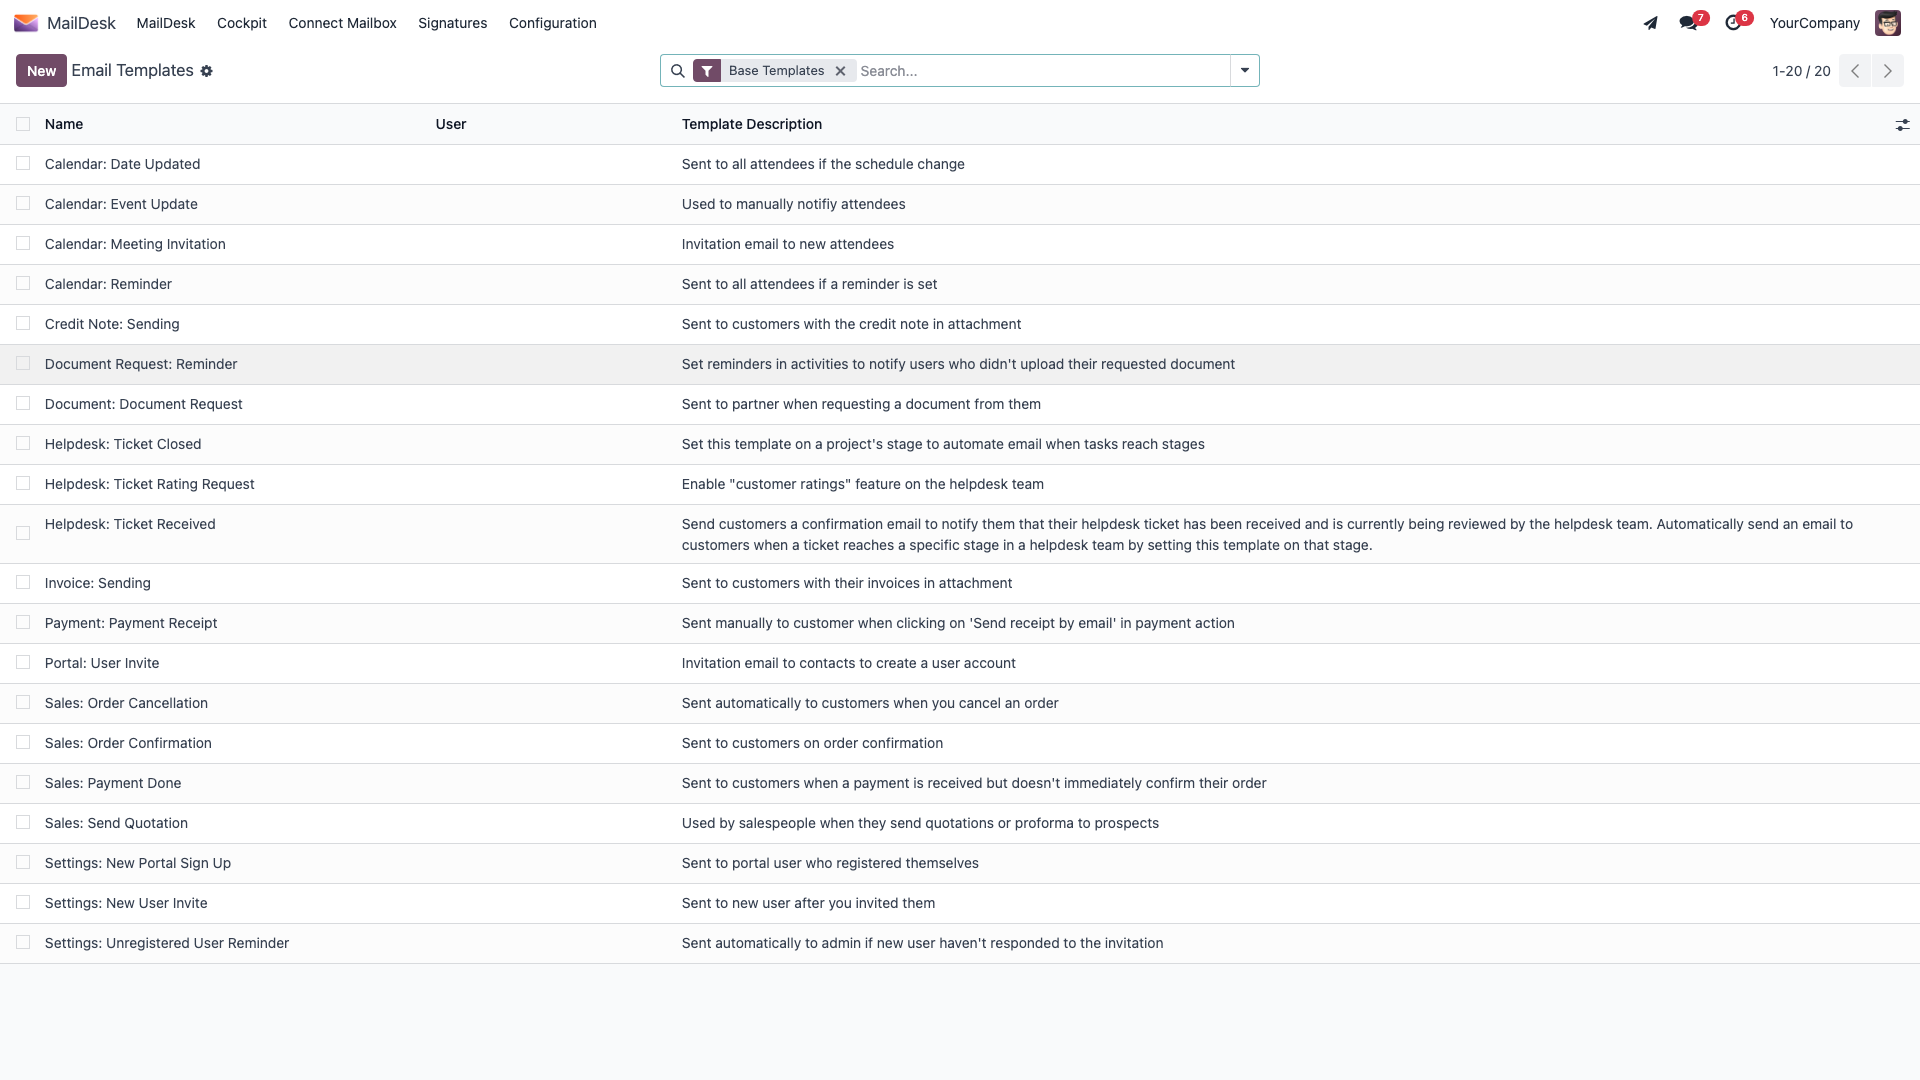
Manage templates (administrators)
Templates are created and edited by administrators from MailDesk → Configuration → Mailboxes → Email Templates. There you set the template's name, subject, body, attachments, recipients, and any record binding. Once saved, it shows up in the composer's template picker for the relevant users.
If sending fails
MailDesk never silently drops an email. If a message doesn't go out:
- Check your Drafts folder — your work may have been kept there safely.
- Confirm the mailbox in From has a working outgoing server (SMTP or OAuth). This is an administrator setting.
- If it still fails, ask your Odoo administrator to check the server logs.
Troubleshooting
| Symptom | Likely cause | What to do |
|---|---|---|
| A sent message hasn't appeared under Sent | The provider's copy is still syncing in | Wait a moment; MailDesk shows your copy immediately and the provider's follows |
| I can't find a sent message later | Your provider may use a different Sent folder | Check which folder your provider files sent mail under |
| The message won't send | The outgoing server isn't set up, or credentials expired | Have your administrator check the From mailbox's outgoing server |
| The Insert template button is missing | Templates are Available in: Pro | Confirm MailDesk Pro is installed; ask your administrator |
| No templates are listed | None are available for your account yet | Ask an administrator to create templates (Manage templates, above) |
| The signature doesn't appear | No default signature for the mailbox, or the wrong mailbox is selected | Set a Default signature for that mailbox; check the From field |
| Closing the composer lost my text | Closing discards unsaved changes | Use Draft to save before closing |